Exploring AWS Serverless Deployments with CDK v2: From RSS to X Posts - Part 1 of the Odyssey
Weekend projects often come and go, but on the rare occasion, one does stand out that is truly worth documenting.
In this multi-part blog series I invite you to join me on a journey into the realm of AWS serverless architecture deployments with CDK v2.
Together, we’ll embark on a fascinating exploration - from harvesting RSS feeds to crafting X Posts.
Throughout this series, we’ll explore how to set up a serverless solution that automatically gathers information from an RSS feed, extracts the important details from XML and saves them efficiently in a DynamoDB table.
Plus, we’ll see how new entries in our DynamoDB table invokes a Lambda function to create X Posts using DynamoDB Streams.
In my professional sphere, I predominantly rely on the Azure SDK for Python, with occasional use of Terraform, while my personal projects frequently entail Pulumi, Terraform and once in a blue moon CloudFormation (Shocking, I know). However, for this specific endeavor, we are utilizing the AWS CDK as our conduit.
AWS CDK is an Infrastructure as Code tool that empowers us to define and manage resources with code, offering a fresh perspective on serverless architecture deployments.
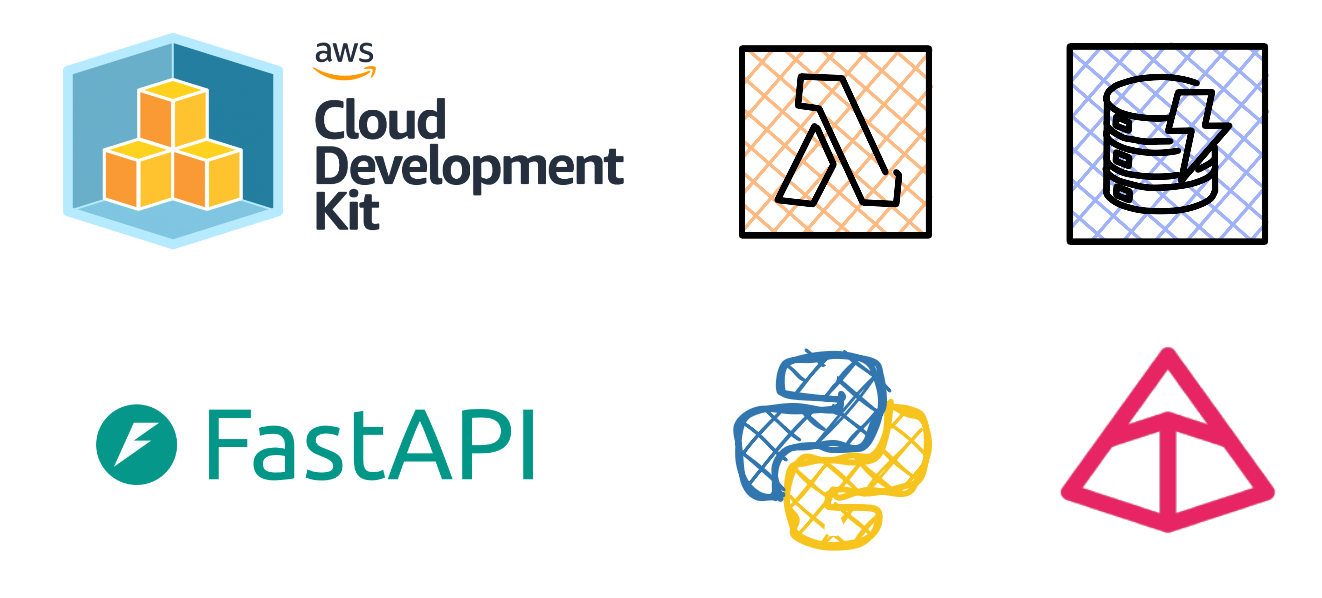
Before we dive in, lets take a moment to visualize the architecture we are about to construct:

Pre-requisites:
- AWS CLI
- AWS CDK v2
- Python
- Docker
Creating a CDK Project
To get started with creating a new CDK project, you’ll need to enter the below commands:
1 | mkdir rss-lambda-ddb-socialshare |
cdk init
Once the cdk init command has executed, you’ll need to activate the virtual environment with one of the below commands depending on your OS:
1 | source .venv/bin/activate |
1 | .venv\Scripts\activate.bat |
Next you will need to install Python packages and dependencies required for our stack and constructs, run the below command:
1 | pip install -r requirements.txt |
Feel free to explore the project directory. You’ll notice folders and files have been created for you.
1 | ┣ 📂.venv |
The app.py file is your app’s entry point. The code in this file instantiates an instance of the RssLambdaDdbSocialshareStack class from the rss_lambda_ddb_socialshare/rss_lambda_ddb_socialshare_stack.py file.
The most important file that we care about is the rss_lambda_ddb_socialshare/rss_lambda_ddb_socialshare_stack.py file, this is where most of the code to define resources will be added.
We will modify the stack to create the below resources:
- DynamoDB Table
- 2 Lambda Functions
- EventBridge rule
The first construct in our stack that we will add is a DynamoDB Table, you’ll need to import RemovalPolicy and aws_dynamodb as dynamodb. Then modify the stack, I have included code snippets that you can use to overwrite what is currently in the rss_lambda_ddb_socialshare/rss_lambda_ddb_socialshare_stack.py file.
The removal policy we have defined in the DynamoDB Table construct is destructive, for production environments one would use the RETAIN attribute, e.g. removal_policy=RemovalPolicy.RETAIN
cdk synth
The next command to execute is cdk synth, this will generate a CloudFormation template for our current stack and be used for deployment.
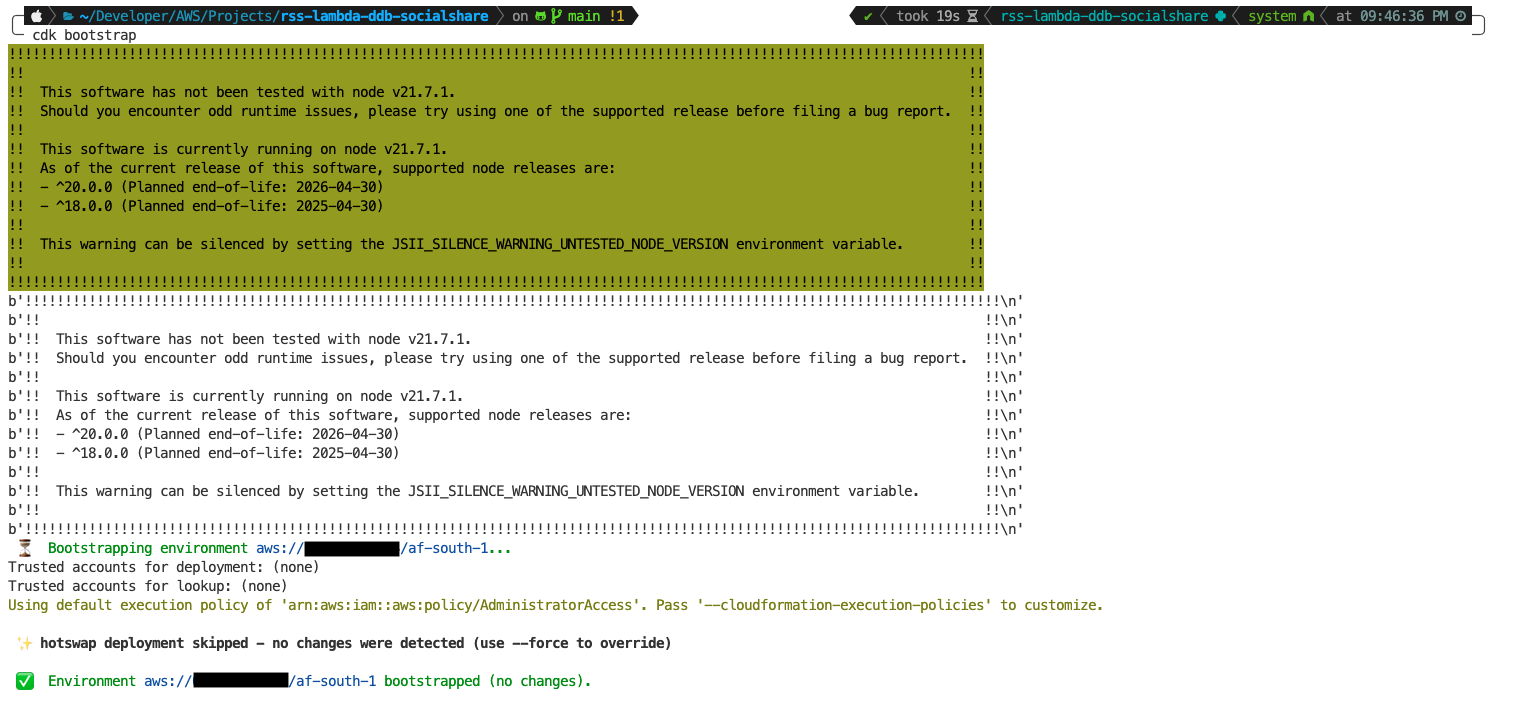
cdk bootstrap
Once synthesized, we need to prepare an environment (target AWS account and AWS Region) for deployment. This is done using the cdk bootstrap command. This will provision an S3 bucket to store files as well as create IAM roles that are required to perform deployments. This command only needs to be run once.
1 | cdk bootsrap aws://{AWS-ACCOUNT-NUMBER}/{REGION} |
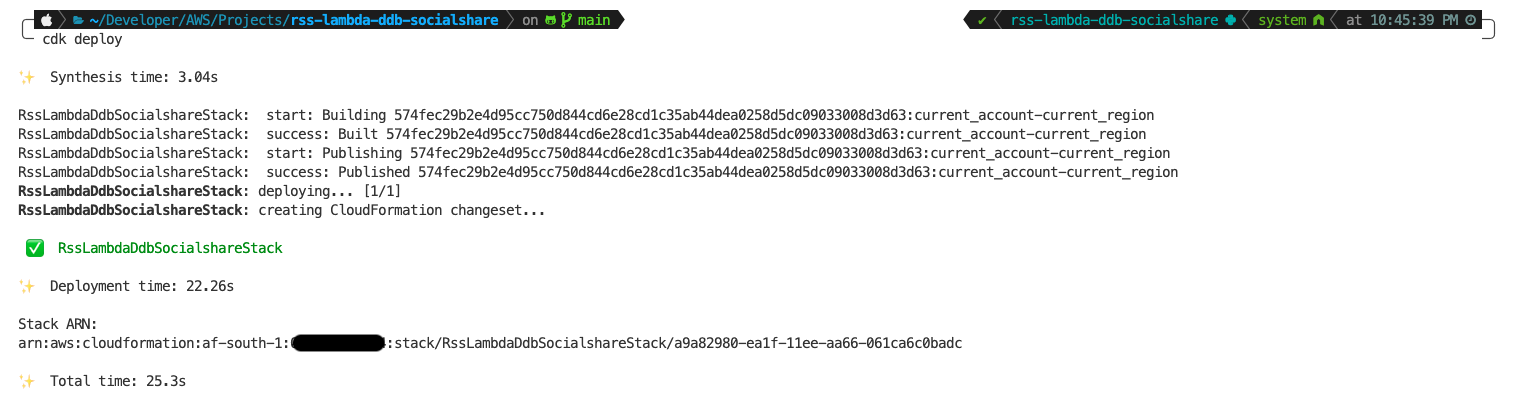
cdk deploy
The cdk deploy command will deploy our stack to AWS.
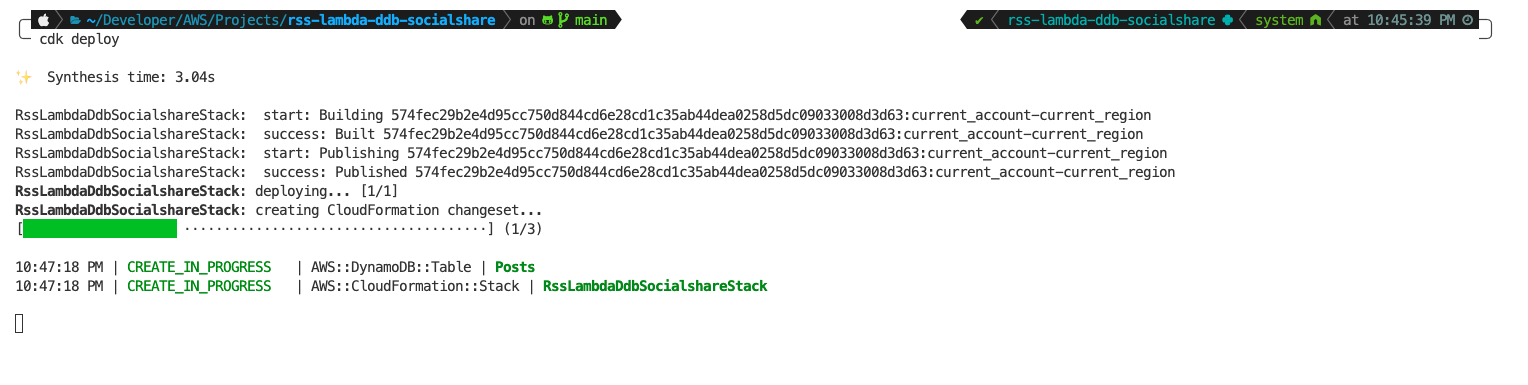
We can verify the deployment was successful by viewing the terminal output, alternatively log into the AWS Management Console.
Conclusion
That concludes Part 1, in an upcoming blog post, we will learn how to create constructs for Lambda functions, granting permissions for constructs within the stack and adding the actual code for our Lambda functions that performs the magic.
Resources
Exploring AWS Serverless Deployments with CDK v2: From RSS to X Posts - Part 1 of the Odyssey